Creating an Angular Library
Just like in any organizations, quite a number of applications might share a common code including client side code. Angular provides a facility to create libraries starting Angular 6. For lower versions, there is a way but it is not as straightforward as in the newer versions.
In this tutorial, we will rewrite the same Hello World application that has been discussed in my previous tutorial. For just the sake of an example, we will make modifications to refactor the hello message component, weather forecast model, and its underlying service into an Angular library. Note that all the above reusable code does not make sense in real world applications but this will just explain how to create and expose those objects in an Angular library. For the real world case, you may want to have a library of controls like a data grid or a message panel.
There are several ways of organizing your projects that includes the Angular library. The suggested way in Angular’s documentation is to have multiple projects under a workspace folder. But coming from Visual Studio background, I would want my Angular library to be a separate Visual Studio Project and my Hello World application to be another project.
Open the Hello World solution. Create a new ASP.NET Core Web Application project named Hello.Common:

Select Angular from the list of templates:

Once again delete the ClientApp folder as we will be creating this via command prompt. Open the Node.js command prompt and navigate to the Hello.Common folder. Run the following command to create the Angular workspace:
ng new ClientApp --create-application false --style scss
Here, we tell not to create an Angular application and just start with an empty workspace. When prompted whether to add Angular routing, select No. Now, let’s create the Angular library by running the following command:
cd ClientApp
ng generate library hello-common --prefix hc
Ensure that you are on the newly created ClientApp folder before running the ng generate command. Here, we specify the name of the library with hello-common and the default prefix for the newly added components to be hc.
Let’s take a look at the files that it has created. Firstly, the public-api.ts contains the files that you want to expose and share to other applications referencing this library. By default, it is exposing a service, a component, and a module:
/*
 * Public API Surface of hello-common
 */

export * from './lib/hello-common.service';
export * from './lib/hello-common.component';
export * from './lib/hello-common.module';
Delete the service and component exports. We delete these exports because we want to create folders for our components and services for the sake of properly organizing our library. Delete also the service and component files as well as their associated spec files. Finally, delete also the import of the hello-common.component on our hello-common.module file.
Let’s now create the hello message component:
ng generate component components/hello-message
Take note here that we don’t specify any module because we only have one module. Also, take note that we don’t specify the project because we only have one project.
Open the html file and modify the text just to indicate that this component is coming from our shared library:
<p>Hello World message from our Angular Library!</p>
Next, let’s create the model:
ng generate class models/weather-forecast --skipTests=true
You can copy the definition our the WeatherForecast model from our HelloWorld.Web app:
export class WeatherForecast {
  public dateFormatted: string;
  public temperatureC: number;
  public summary: string;

  public get temperatureF(): number {
    return 32 + (this.temperatureC / 0.5556);
  }
}
Finally, our service:
ng generate service services/weather-forecast
Again, copy the definition from our HelloWorld.Web app:
import { Injectable } from '@angular/core';
import { HttpClient } from '@angular/common/http';
import { Observable } from 'rxjs';

import { WeatherForecast } from '../models/weather-forecast';

@Injectable({
  providedIn: 'root'
})
export class WeatherForecastService {

  constructor(private http: HttpClient) { }

  public getList(): Observable<WeatherForecast[]> {
    return this.http.get<WeatherForecast[]>('/api/sampleData/weatherForecasts');
  }
}
Export the service and model in our public-api.ts file:
export * from './lib/models/weather-forecast';
export * from './lib/services/weather-forecast.service';
export * from './lib/components/hello-message/hello-message.component';
export * from './lib/hello-common.module';
We also need to export our component to the hello common module:
import { NgModule } from '@angular/core';
import { HelloMessageComponent } from './components/hello-message/hello-message.component';

@NgModule({
  declarations: [HelloMessageComponent],
  imports: [],
  exports: [HelloMessageComponent]
})
export class HelloCommonModule { }
Note that if we are just going to use the component on the html file using the <hc-hello-message></hc-hello-message>, then we have to export it on the common module. Then, if we are going to instantiate the component in the JavaScript as in, new HelloMessageComponent(), then we have to expose it via the public-api.ts.
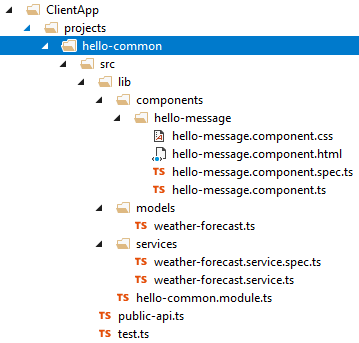
After creating all those files, your library should have the following structure:
Now, let’s clean the HelloWorld.Web up a little bit by deleting the hello message component, weather forecast model, and weather forecast service. After deleting those files, your web application should have the following structure (hello message component removed, empty models folder, and empty services folder):

Now, how do we reference the library to our application? We must build the library first. Open the ng-package.json, modify the destination to be under the HelloWorld.Web’s ClientApp folder:
{
  "$schema": "../../node_modules/ng-packagr/ng-package.schema.json",
  "dest": "../../../../HelloWorld.Web/ClientApp/dependencies/hello-common",
  "lib": {
    "entryFile": "src/public-api.ts"
  }
}
I have used dependencies folder here instead of dist as the build output for the HelloWorld.Web will use dist and we don’t want to have a clash with the build output for the web application.
Now, run the following to build our library:
npm run build
If you want a production version, you can run:
npm run build -- --prod
This will build the library under the dependencies folder of the HelloWorld.Web’s ClientApp folder.
To reference our new library to our HelloWorld.Web project, open it’s tsconfig.json file and add a paths property under the compilerOptions. Here, you’ll have to specify the library path:
{
  "compileOnSave": false,
  "compilerOptions": {
    // other compiler options
    "paths": {
      "hello-common": [
        "dependencies/hello-common"
      ],
      "hello-common/*": [
        "dependencies/hello-common/*"
      ]
    }
  }
}
Now, you’d be able to import the objects from your hello-common library. Let’s make changes on the app.module file of your HelloWorld.Web project. Import the hello-common module and import it on our app module:
import { HelloCommonModule } from 'hello-common';

@NgModule({
  declarations: [
    AppComponent,
    WeatherForecastsComponent
  ],
  imports: [
    BrowserModule,
    HttpClientModule,
    AppRoutingModule,
    HelloCommonModule
  ],
  providers: [],
  bootstrap: [AppComponent]
})
export class AppModule { }
NOTE: You may have some remnants of the HelloMessageComponent. Just remove any instances of this component.
Update the app-routing.module so that our HelloMessageComponent will get it from our common library:
import { HelloMessageComponent } from 'hello-common';
Update also the weather-forecasts.component so that the weather forecast service and model will get it from our common library:
import { WeatherForecastService } from 'hello-common';
import { WeatherForecast } from 'hello-common';
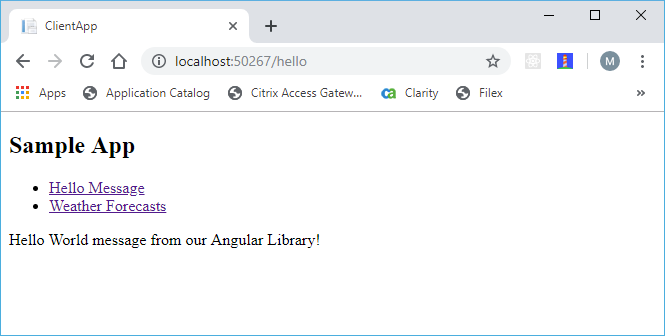
Build and run your web application. Navigate to Hello Message. You will get the component from your Angular library.
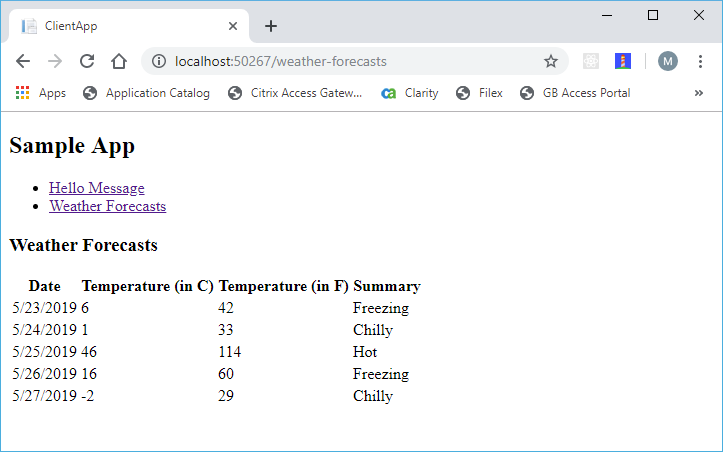
Navigate to Weather Forecasts. Your page shall function the same way as before and shall fetch the forecasts from the server.
So, you now have created your first Angular library. While there is really no need to create a separate application for a small application such as in the sample in this tutorial, this would be particularly useful for larger projects where it requires you to share a common code among different applications.