Angular in ASP.NET Core
This is a step by step guide on how to create an Angular application with ASP.NET Core as the server side code. This will also cover my suggested folder structure for your components, services, and all your other files.
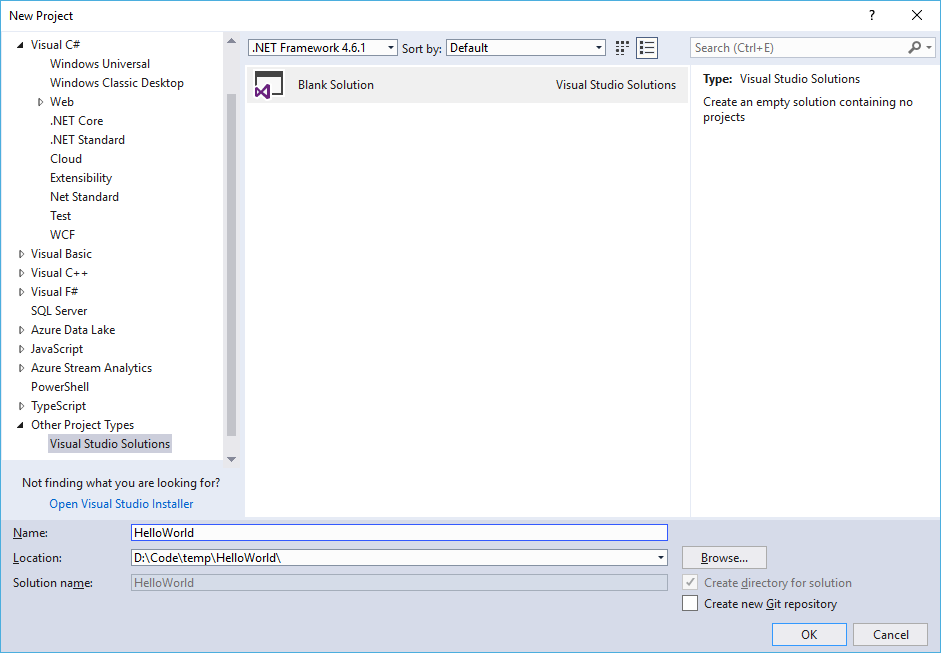
To begin, open Visual Studio and create a new project. I would usually start with a Blank Solution; so, you can scroll to Other Project Types > Visual Studio Solutions and select Blank Solution.
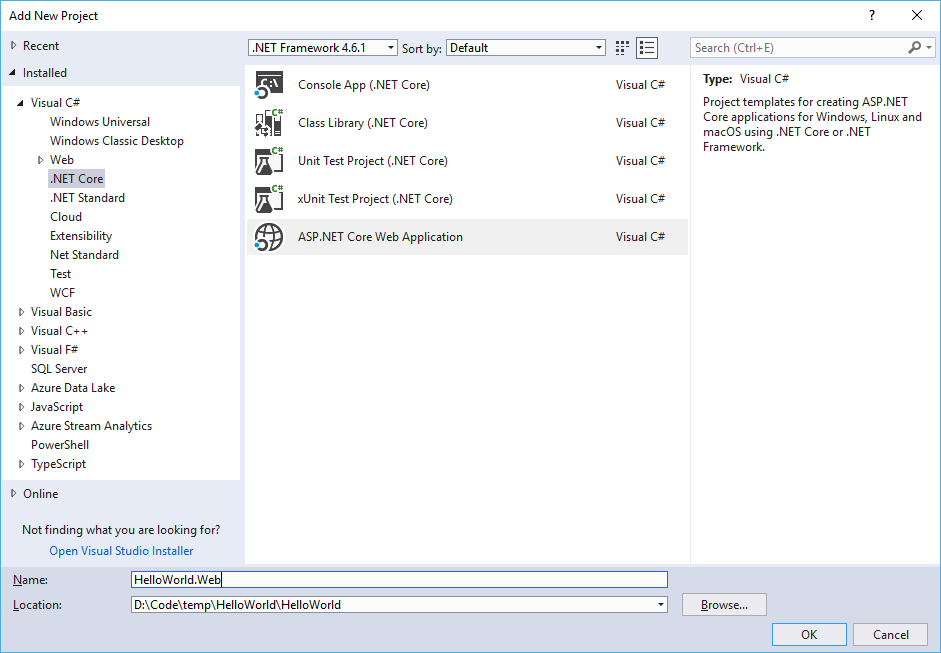
In your Solution Explorer, right click your solution > Add > New Project… Select Visual C# > .NET Core > ASP.NET Core Web Application.
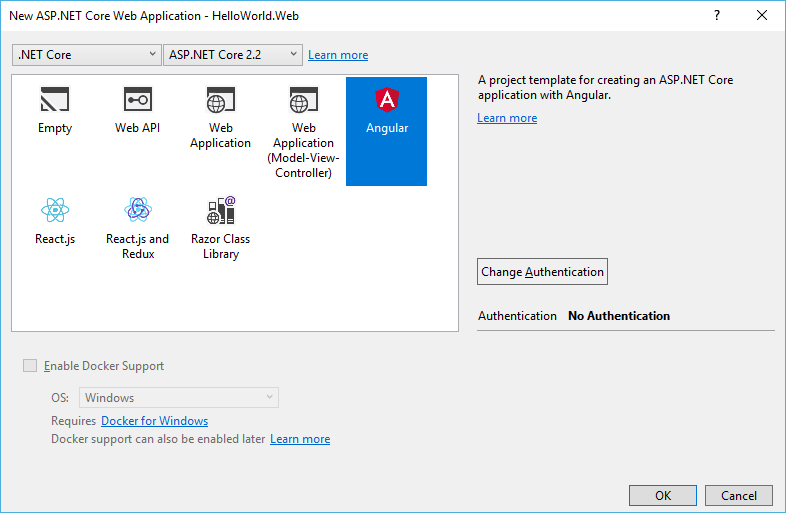
Use the latest version of ASP.NET Core (2.2 as of this writing). Select Angular and specify No Authentication method.
For ASP.NET Core 2.2, the Angular version it will include in the template is 6.x. To use the latest, you have to delete ClientApp folder, then open node.js command prompt. Go to the folder of your project and install the latest angular cli:
npm install -g @angular/cli@latest
Create a new angular application using the following command:
ng new ClientApp --style scss
This will use scss as your stylesheet format. If you don’t want to use scss, you can replace it with your desired format.
Next, it will prompt you whether or not to include routing. Type Y.
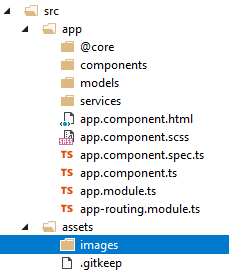
After it finished downloading your application template, you will be able to see the following structure of your ClientApp:
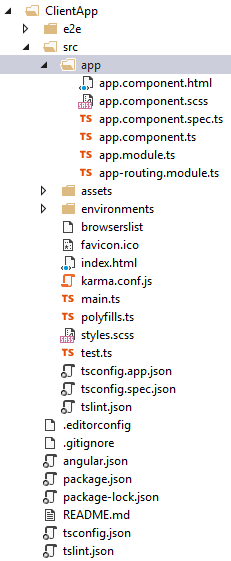
Now, on to the folder structure, while there can be several ways to organize your files, I would suggest the following structure:
- app
- @core – for your framework related files
- components – for your angular components (e.g. pages, controls, sections)
- models – for your view models (or data models)
- services – for your angular services
- assets
- images – for your images in your application
This is how your folder structure would look like:
Now, let’s create a few pages. We run the following on our command prompt:
cd ClientApp
ng generate component components/hello-message --module=app.module
Ensure that you are on the ClientApp directory before running ng generate. This will create a hello-message component and import it on app.module. Note that we put it on the subfolder components by specifying it with ‘components/’ before the name of our component.
Let’s create another page:
ng generate component components/weather-forecasts --module=app.module
Now, we add routes going to the pages we have created. Open app-routing.module and modify the value our routes:
const routes: Routes = [
  { path: 'hello', component: HelloMessageComponent },
  { path: 'weather-forecasts', component: WeatherForecastsComponent }
];
This tells to load our HelloMessageComponent when user navigates to /hello and WeatherForecastsComponent when it’s /weather-forecasts. We have to import our components so Angular knows where it will obtain:
import { HelloMessageComponent } from './components/hello-message/hello-message.component';
import { WeatherForecastsComponent } from './components/weather-forecasts/weather-forecasts.component';
Now, let’s just create a simple navigation on our app.component.html by replacing its content with the following:
<h2>Sample App</h2>
<ul>
  <li>
    <a routerLink="/hello">Hello Message</a>
  </li>
  <li>
    <a routerLink="/weather-forecasts">Weather Forecasts</a>
  </li>
</ul>
<router-outlet></router-outlet>
Note that when we want to navigate to one of our Angular routes, we have to use routerLink attribute instead of using the href.
The router-outlet element is the placeholder for the component to be loaded as specified in our route definition.
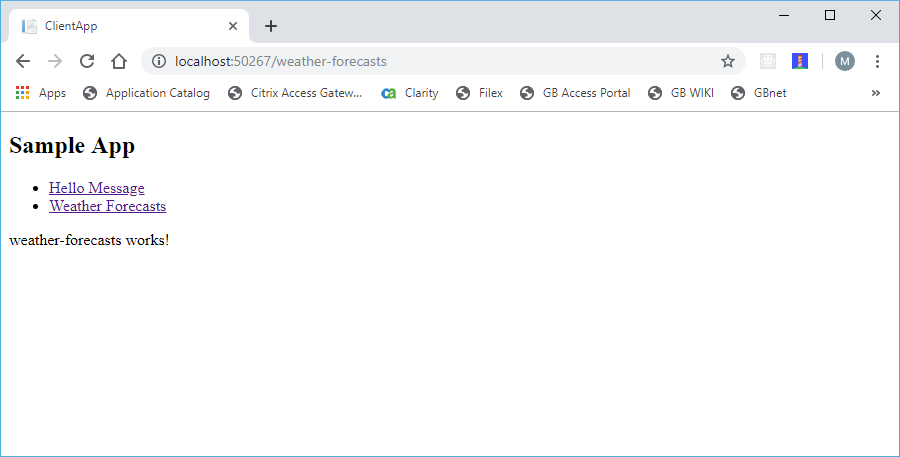
When you run this, you’ll be getting a simple page that allows you to navigate to the two static pages we have just created:
Now, let’s display a few data taken from the server. For that, we need to create a client model that matches the server model. You can inspect the server data model by going to SampleDataController.cs:
public class WeatherForecast
{
    public string DateFormatted { get; set; }
    public int TemperatureC { get; set; }
    public string Summary { get; set; }

    public int TemperatureF
    {
        get
        {
            return 32 + (int)(TemperatureC / 0.5556);
        }
    }
}
Execute the following on the command prompt to create our client data model:
ng generate class models/weather-forecast --skipTests=true
The –skipTests parameter is used to indicate that we do not want to create a spec file for testing. Now, open the weather-forecast.ts and define our model:
export class WeatherForecast {
  public dateFormatted: string;
  public temperatureC: number;
  public summary: string;

  public get temperatureF(): number {
    return 32 + (this.temperatureC / 0.5556);
  }
}
In TypeScript, the default access modifier of a field is public. Thus, the above definition can be simplified by removing the public keyword.
Now, let’s create our service that will make the call to the server side to get our data. Execute the following on the command prompt:
ng generate service services/weather-forecast
This weather forecast service is responsible for getting our data to our server using HttpClient and so we need to import the HttpClientModule to our application. We do that by adding it to the imports collection in our AppModule class:
// ...
// More imports here
// ...
import { HttpClientModule } from '@angular/common/http';

@NgModule({
  // ...
  // other parameters here
  // ...
  imports: [
    BrowserModule,
    HttpClientModule,
    AppRoutingModule
})
export class AppModule { }
Open the generated weather-forecast.service.ts and import HttpClient:
import { HttpClient } from '@angular/common/http';
We have to inject an HttpClient instance to our service to be able to make calls to the server. We do that using constructor dependency injection:
@Injectable({
  providedIn: 'root'
})
export class WeatherForecastService {

  constructor(private http: HttpClient) { }
}
Now, let’s write the code to get the weather forecasts from our server. In our WeatherForecastService, create a getList() method:
public getList() {
  return this.http.get<WeatherForecast[]>('/api/sampleData/weatherForecasts');
}
You would need to import the WeatherForecast model on this file:
import { WeatherForecast } from '../models/weather-forecast';
Now, let’s use the WeatherForecastService on our WeatherForecastsComponent. In our weather-forecasts.component.ts file, import and inject the WeatherForecastService. Then, call its getList() method and assign its returned data on the component’s property (so that, we can use that in our form later):
import { Component, OnInit } from '@angular/core';

import { WeatherForecastService } from '../../services/weather-forecast.service';

@Component({
  selector: 'app-weather-forecasts',
  templateUrl: './weather-forecasts.component.html',
  styleUrls: ['./weather-forecasts.component.scss']
})
export class WeatherForecastsComponent implements OnInit {
  public weatherForecasts: any

  constructor(private weatherForecastService: WeatherForecastService) { }

  ngOnInit() {
    this.weatherForecastService.getList()
      .subscribe((weatherForecasts) => {
        this.weatherForecasts = weatherForecasts;
      });
  }

}
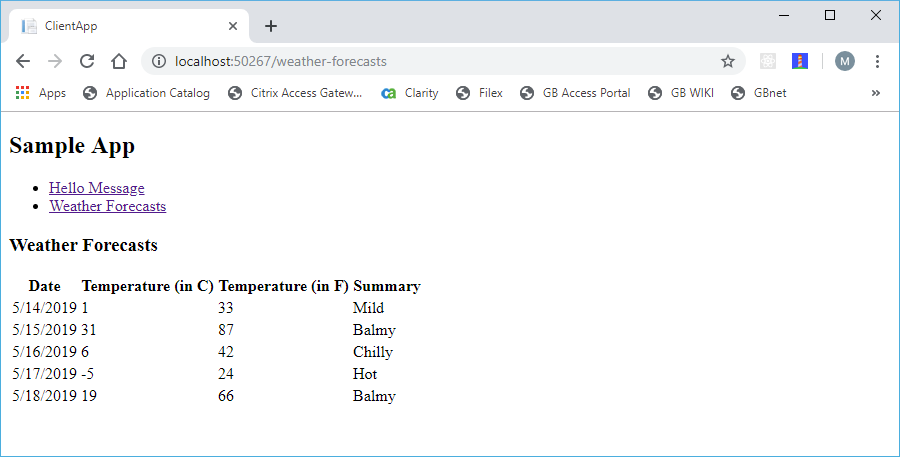
Open the weather-forecasts.component.html file and replace its content with the following:
<h3>Weather Forecasts</h3>

<table>
  <thead>
    <tr>
      <th>Date</th>
      <th>Temperature (in C)</th>
      <th>Temperature (in F)</th>
      <th>Summary</th>
    </tr>
  </thead>

  <tbody>
    <tr *ngFor="let f of weatherForecasts">
      <td>{{f.dateFormatted}}</td>
      <td>{{f.temperatureC}}</td>
      <td>{{f.temperatureF}}</td>
      <td>{{f.summary}}</td>
    </tr>
  </tbody>
</table>
Here, we have the familiar html code with a few Angular template code. Firstly, we have the ngFor directive iterating over the list of forecasts, which will create one table rows each with a couple of cells.
Then, we also have a double curly braces – which denotes that inside this is a TypeScript code. Thus, in each cell, we display each field of the forecast.
Before we end this tutorial, let’s improve on our code so that our service will return an Observable and our component will subscribe to an Observable. Here is the improved WeatherForecastService:
import { Injectable } from '@angular/core';
import { HttpClient } from '@angular/common/http';
import { Observable } from 'rxjs';

import { WeatherForecast } from '../models/weather-forecast';

@Injectable({
  providedIn: 'root'
})
export class WeatherForecastService {

  constructor(private http: HttpClient) { }

  public getList(): Observable<WeatherForecast[]> {
    return this.http.get<WeatherForecast[]>('/api/sampleData/weatherForecasts');
  }
}
It’s important to note that our getList() returns an Observable<WeatherForecast[]>, i.e. the generic type is an array of WeatherForecast.
In our component, we define our weatherForecasts property as a strongly-typed object. Below is our improved component code:
import { Component, OnInit } from '@angular/core';
import { Observable } from 'rxjs';

import { WeatherForecastService } from '../../services/weather-forecast.service';
import { WeatherForecast } from '../../models/weather-forecast';

@Component({
  selector: 'app-weather-forecasts',
  templateUrl: './weather-forecasts.component.html',
  styleUrls: ['./weather-forecasts.component.scss']
})
export class WeatherForecastsComponent implements OnInit {
  public weatherForecasts: WeatherForecast[];

  constructor(private weatherForecastService: WeatherForecastService) { }

  ngOnInit() {
    this.weatherForecastService.getList()
      .subscribe((weatherForecasts) => {
        this.weatherForecasts = weatherForecasts;
      });
  }

}
It’s important to note that the type of our weatherForecast property is the array, not an Observable.
This article simply gets you familiar with Angular apps. I will write on separate articles for an in-depth discussion of the other concepts such as Angular modules, components, services, and observables.
One Reply to “Angular in ASP.NET Core”
Comments are closed.